1. Login to cPanel and click on ‘Email Accounts’ under the ‘Email’ section
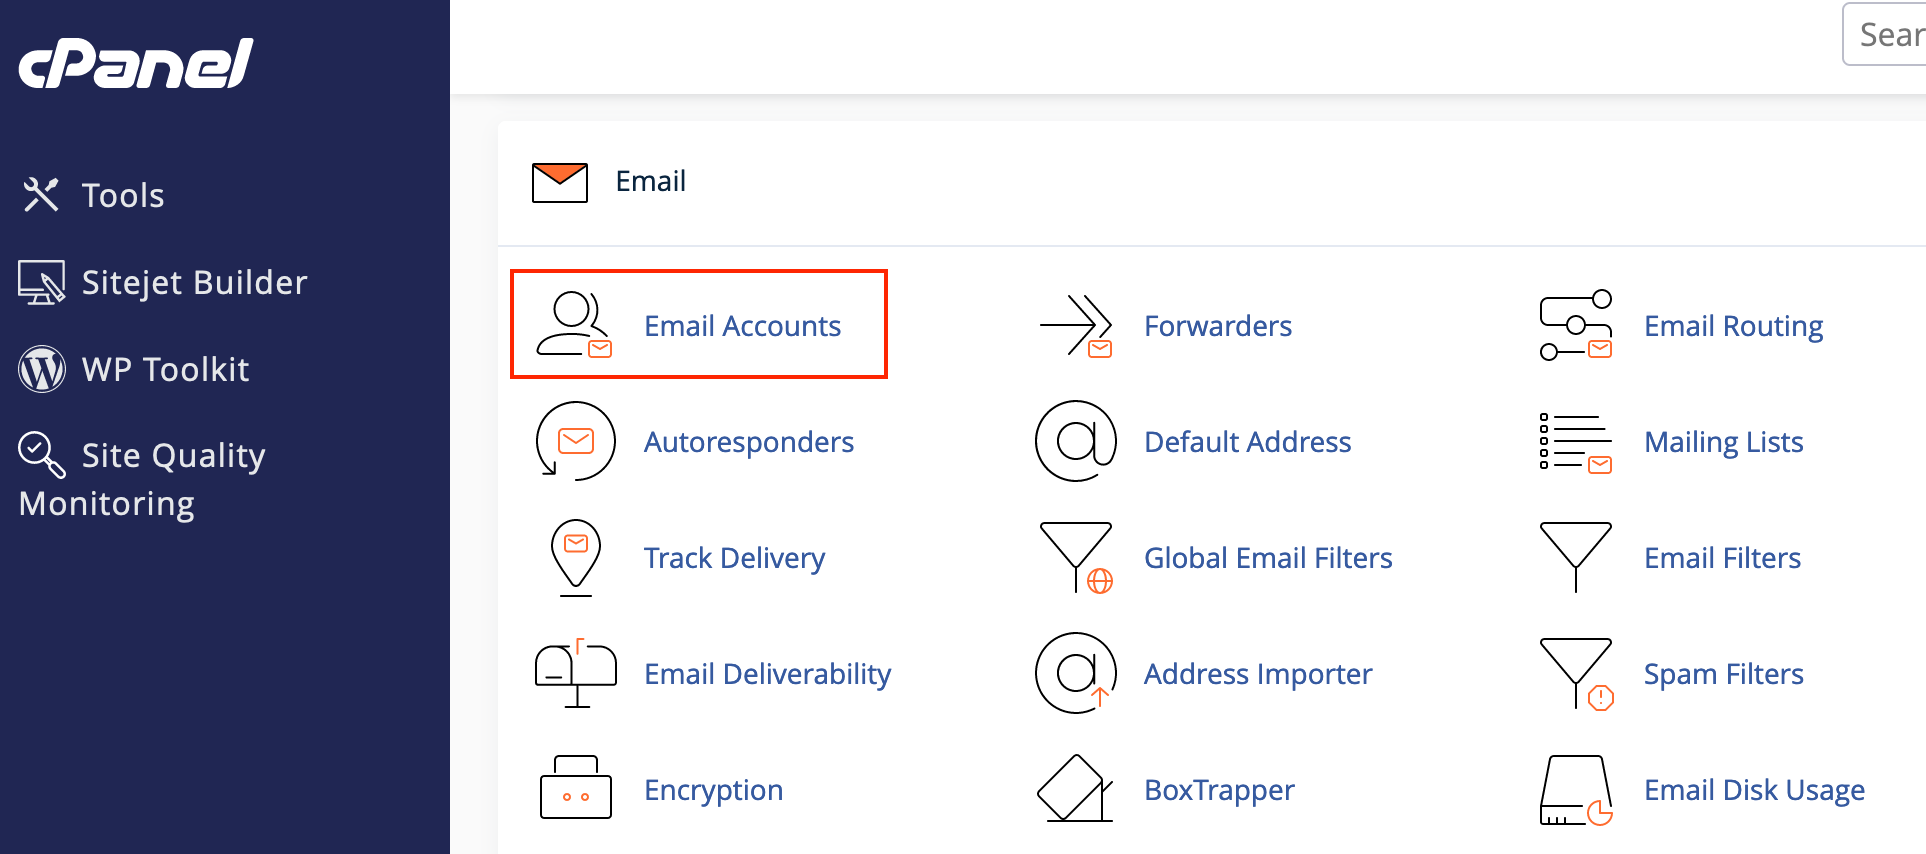
2. Set up a webmail account in cPanel if you do not already have one. Click HERE for how to set up a webmail account
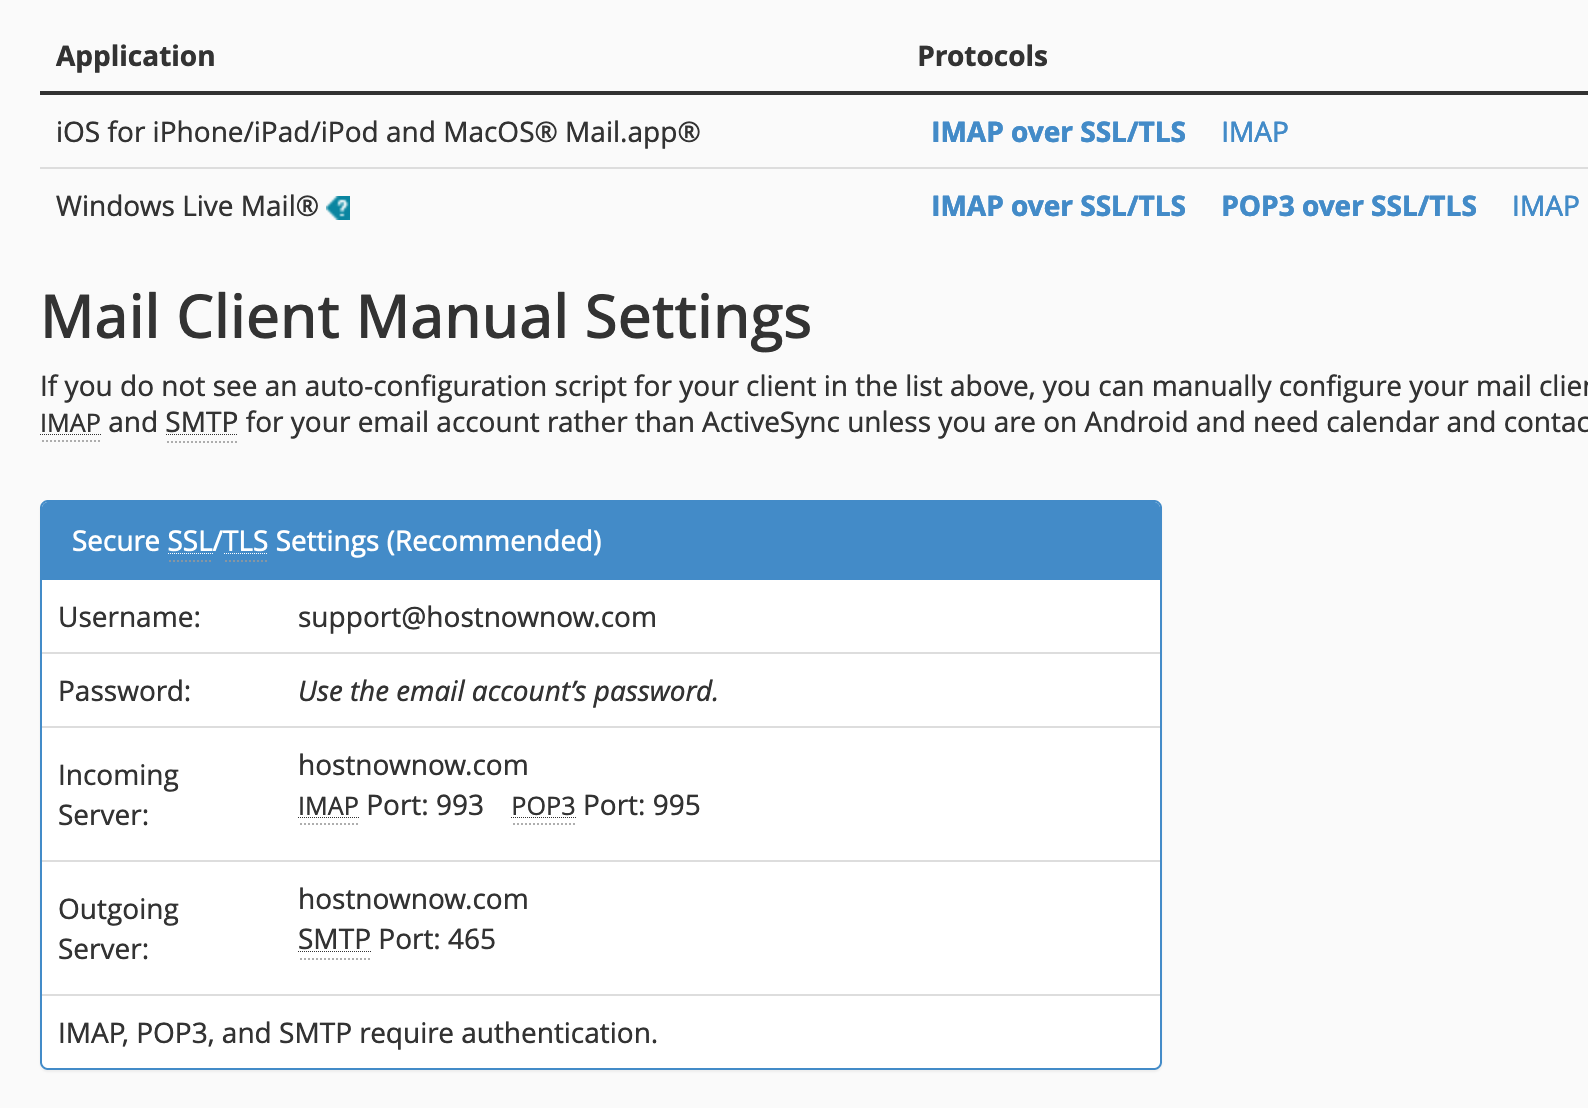
3. Locate your email configuration details by clicking on 'Connect Devices' next to your webmail

4. You will be directed to a new page where you find a section called 'Mail Client Manual Settings'
CONNECT TO GMAIL
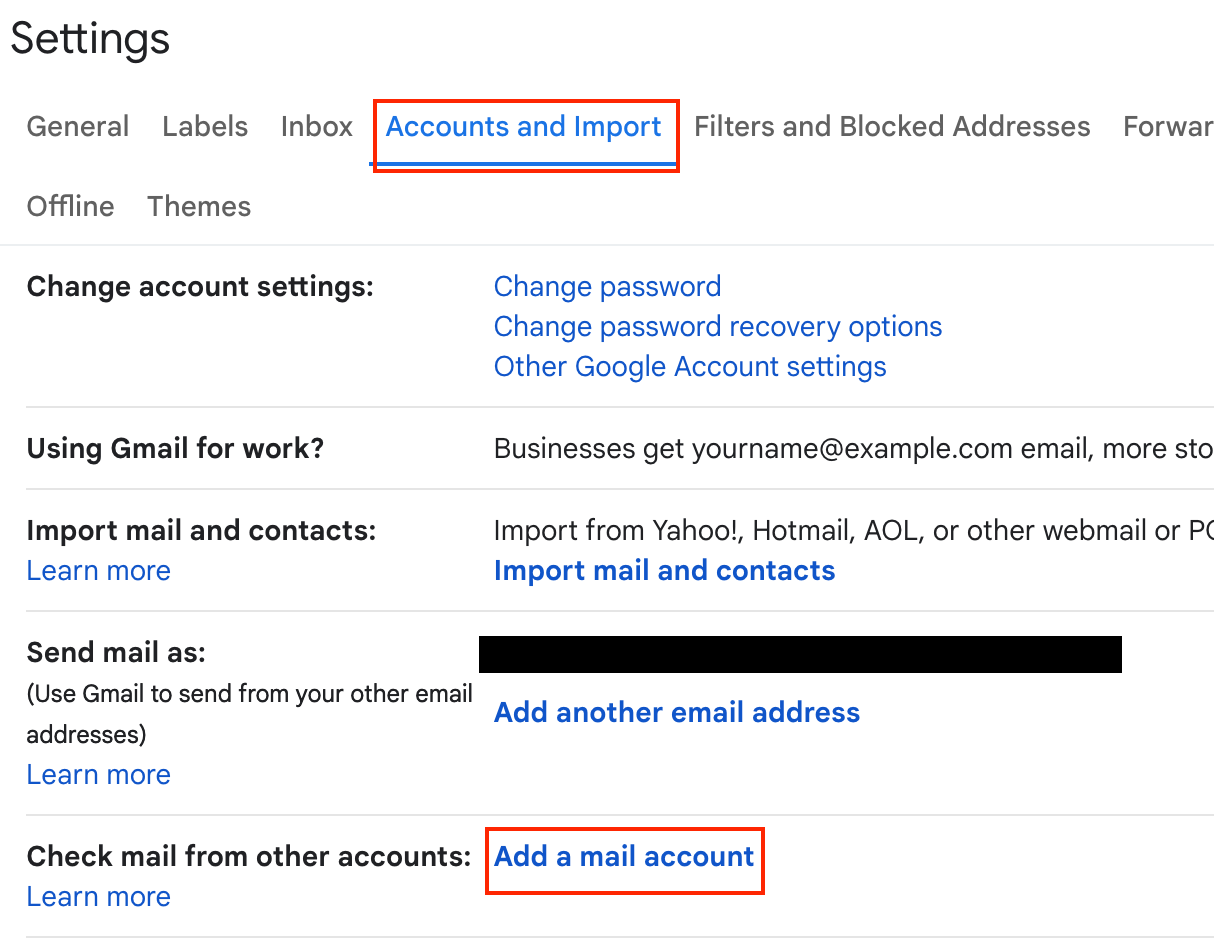
5. Open your Gmail account and click on settings

6. On the Settings page, click on the Accounts and Import tab, and look for the 'Check mail from other accounts' option. Click the 'Add a mail account' link next to this.
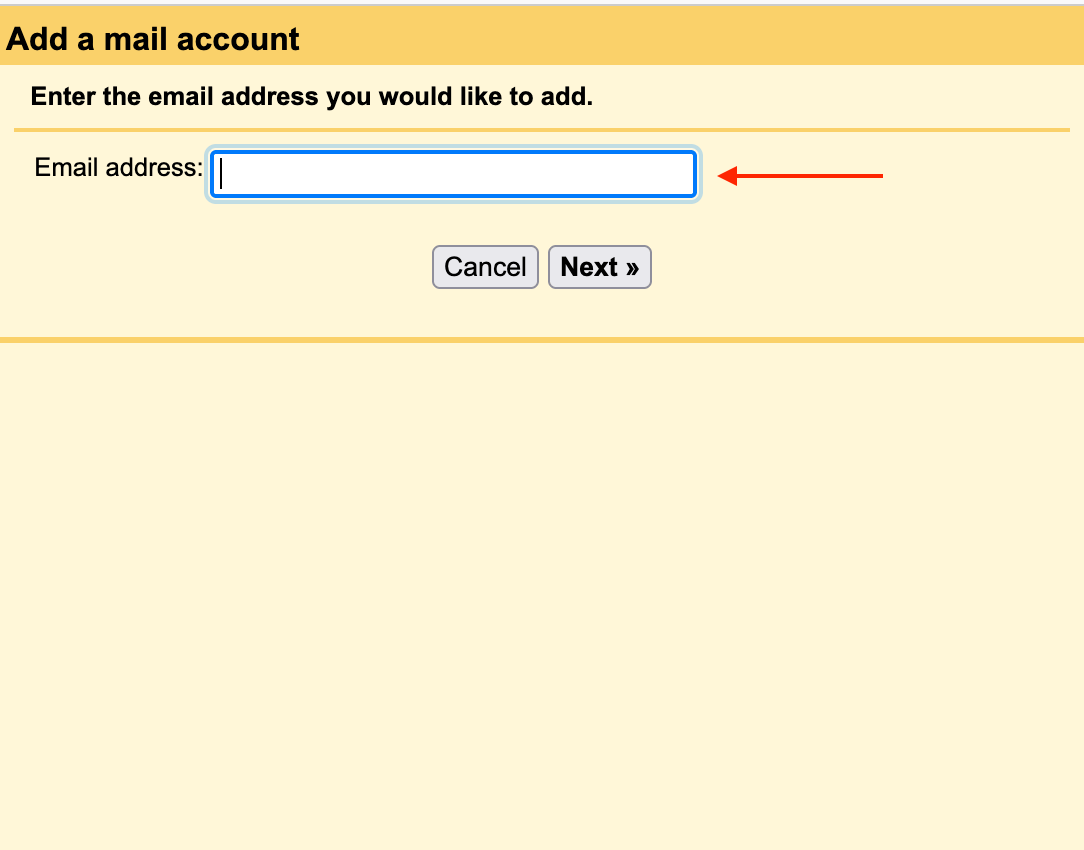
7. A small yellow pop-up window will appear. Firstly, enter the email address associated with the account that you want to add to your Gmail account. Then click Next.
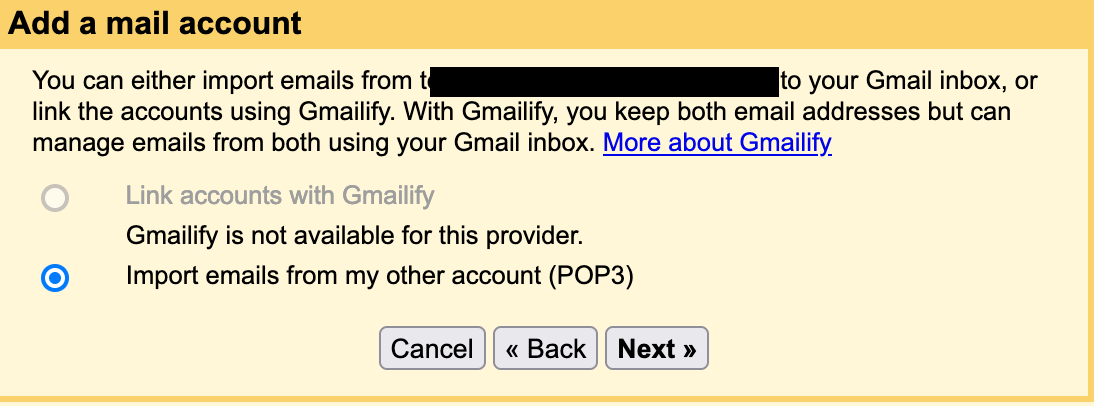
8. Next, you will see the options to choose if you want to link accounts with Gmailify, or if you want to import emails from another account. Choose the second option: Import emails from my other account (POP3). Then click Next.
9. On the next page, you need to add some of your webmail account details. Navigate to your cPanel page where you have the section called 'Mail Client Manual Settings' (see steps 1-4)
Configure the settings as follows:
Username: your email address
Password: password you created when you set up the webmail account
POP Server is the incoming server and the Port is the POP3 Port.
NOTE: If you do not remember your password, you can easily reset it by following the steps HERE
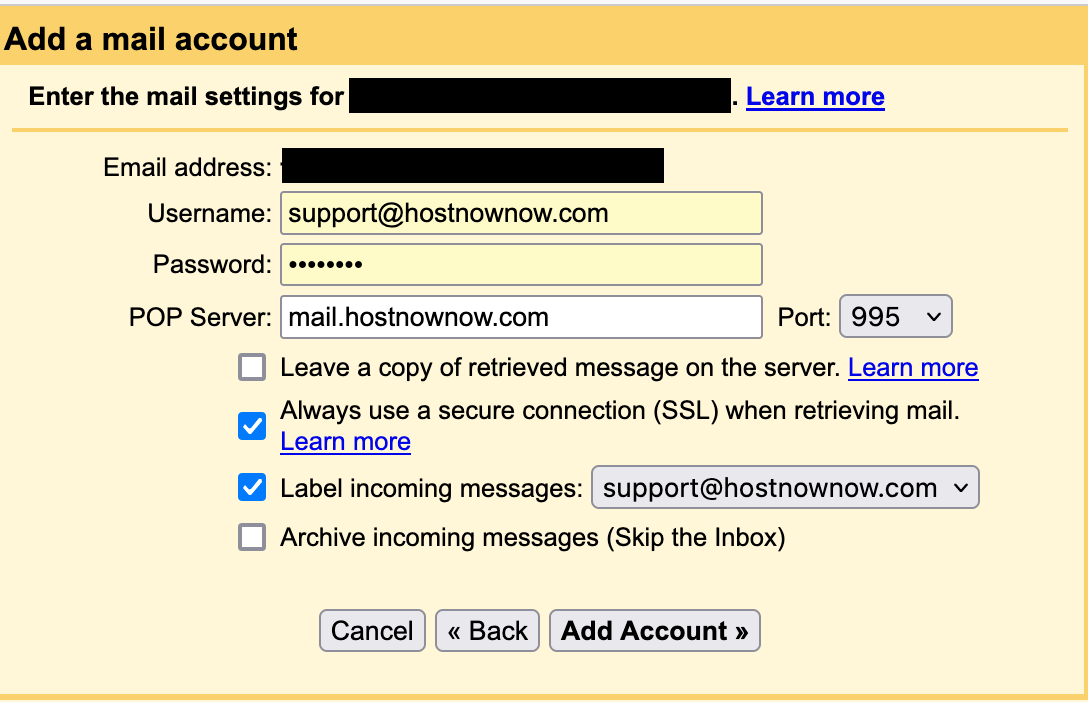
Make sure you tick the box next to Always use a secure connection (SSL) when retrieving mail then tick the other based on your preference:
- If you choose to label incoming messages then there will just be a little label next to each email in your inbox that has come from this address.
- If you choose to archive incoming messages then they will not appear in your inbox.
10. When you have finished entering your details, click Add Account.
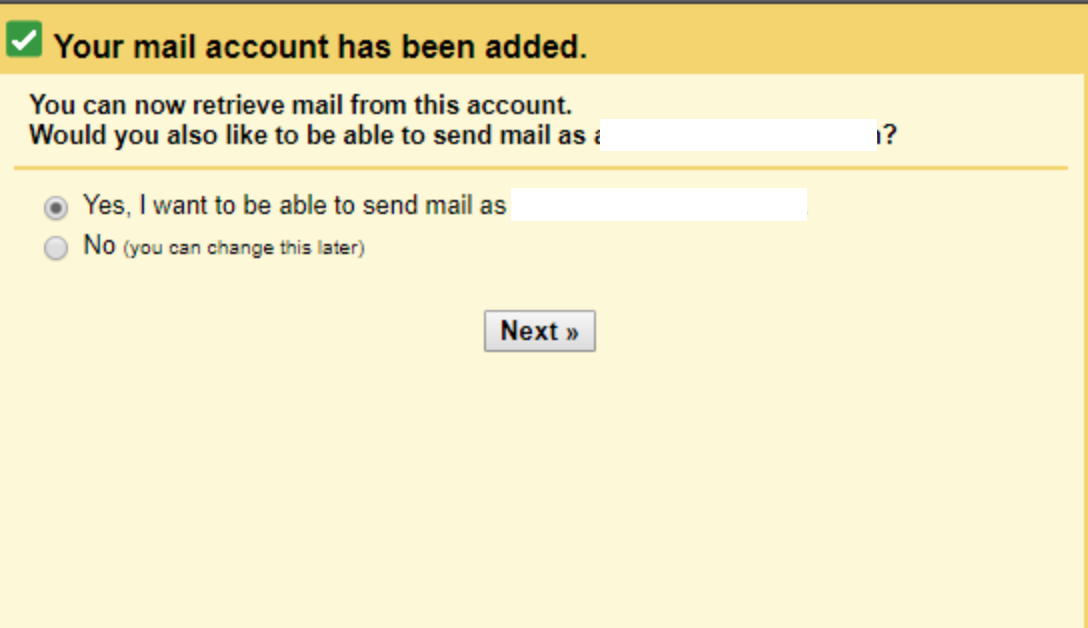
11. If all of your details are correct you will be taken to the next page. Here you will be asked whether or not you want to be able to send mail using your cPanel email address from your Gmail account, as well as receiving emails. Choose Yes and then click Next.
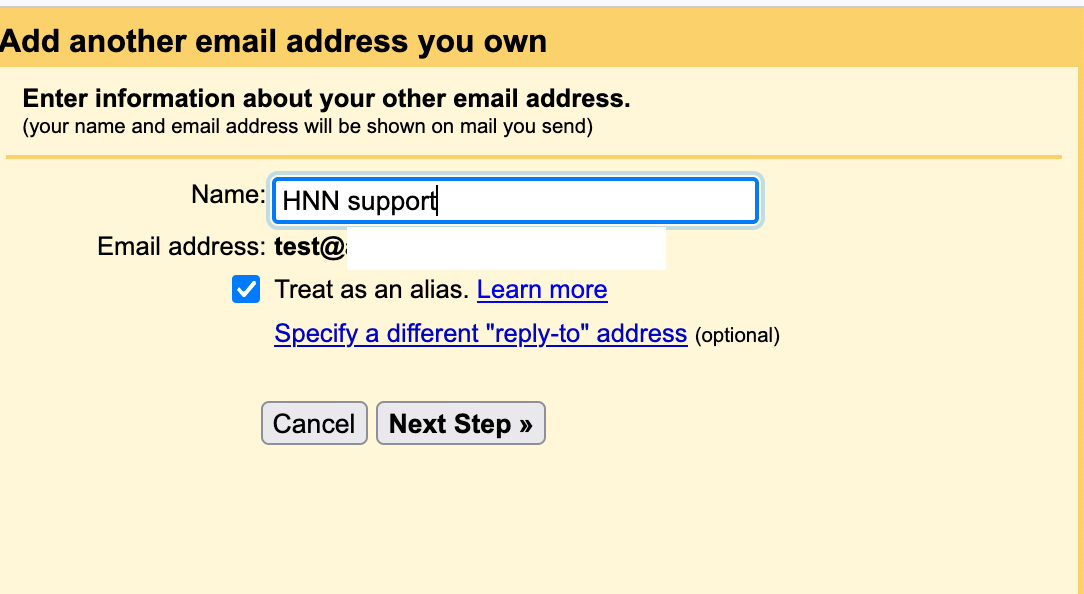
12. On the next page, enter your name. This name will be associated with any emails you send via Gmail using this address. When you are done, click Next Step.
13. On the next page, you will need to enter some more details about your webmail account. Again, Navigate to your cPanel page where you have the section called 'Mail Client Manual Settings' (see steps 1-4).
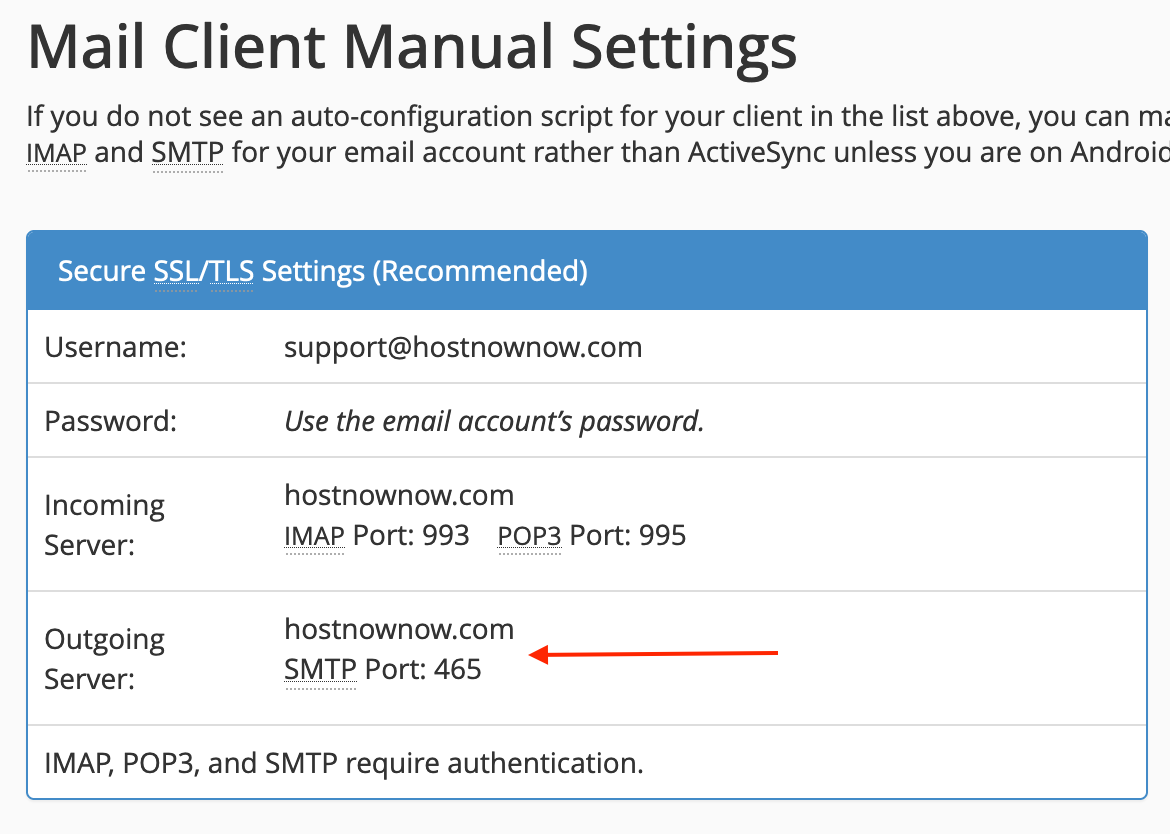
Configure the settings as follows:
Username: your webmail address
Password: password you created when you set up the webmail account
SMTP Server is the incoming server and the Port is the SMTP Port.
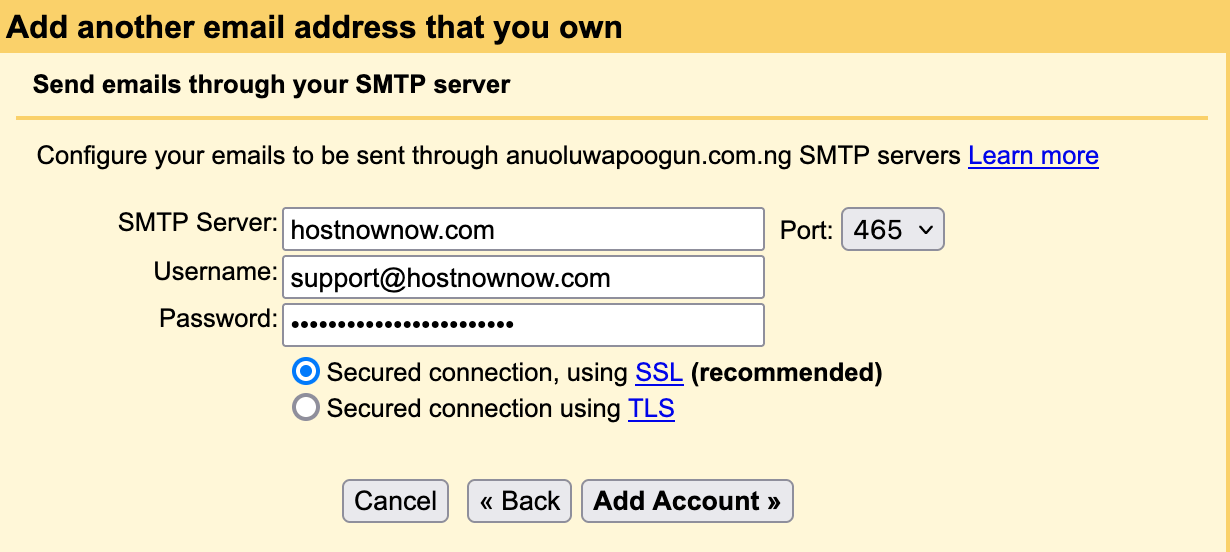
14. Click on Add Account once all the details are filled:
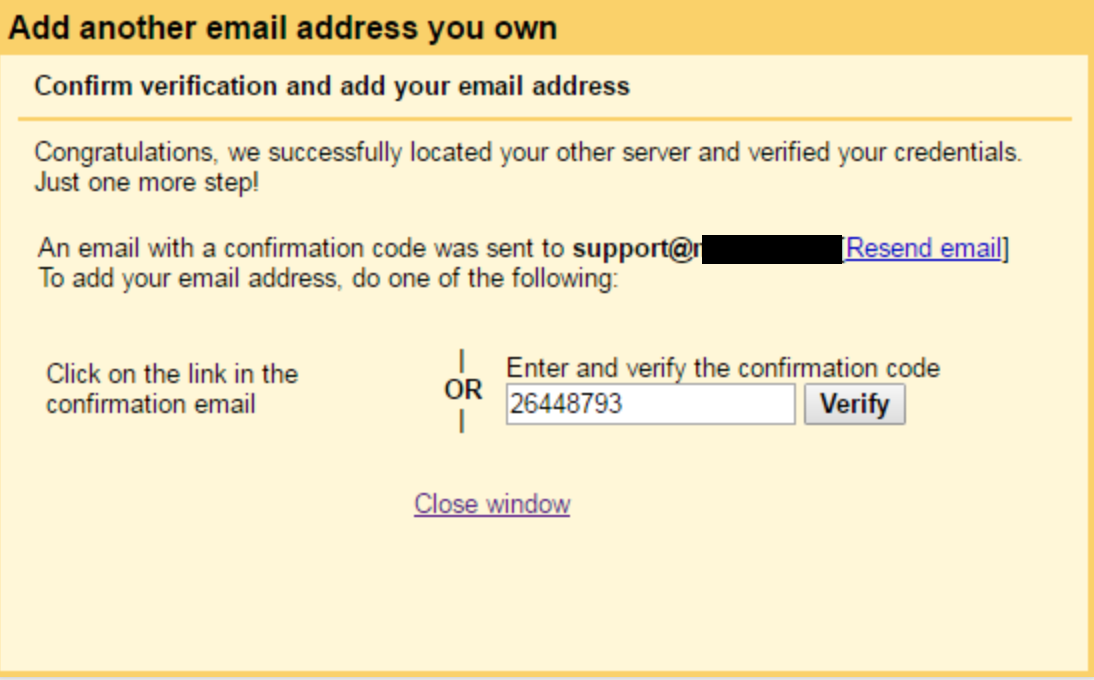
15. Now check the verification code sent to your webmail address (since you already added the account in Gmail, the code will be delivered to the Gmail inbox). Paste it in the corresponding field and click on Verify to finish the setup process
If you have any questions or concerns, please do not hesitate to contact our support team at [email protected]

